Fluxketch
What the list is for
Near handover, someone walks the building and writes down everything that is defective or unfinished — in the UK a snagging list, in the US a punch list. The contractor works through it, the items are re-inspected, and the list is closed. Every item has to answer the same questions: where is it, what is wrong, who fixes it, and what does it look like now.
Why paper lists and camera rolls fall apart
- The location is vague. "Bedroom 2, left wall" depends on which door you came in by. The trade on the next visit reads it differently.
- Photos lose their item. Sixty photos in a camera roll, a numbered list on a clipboard, and the link between the two lives in your head.
- Everything gets typed twice. Notes on site, then the same notes into a spreadsheet at the office, with errors creeping in on the way.
- The issued list drifts. Re-inspection notes end up on a printout that never makes it back into the master list.
What a good snag item records
| Field | Example | Why it matters |
|---|---|---|
| Location | Pin on the plan at the east window of room 2.05 | Nobody has to interpret a description of where |
| Title | 2.05 — paint run on window reveal | Short enough to scan down a list |
| Description | Paint run 150 mm long, right-hand reveal, about 1.2 m above floor | The trade can fix it without calling you |
| Trade | Decorator — written into the title or description | Lets you sort the list by trade |
| Photo | One close-up, one wider shot showing the room | Evidence of the defect, and of the fix later |
Before the walk
- Get the current floor plan from the design team, as DWG or DXF if you can, or as a PDF. Snags pinned to a superseded layout cause arguments later.
- Open it on the iPad. A PDF can go in as an underlay — the drawing sits underneath and you work on top of it. Details on opening CAD files are in How to open DWG files on iPad.
- Turn off the layers you don't need on a walk — furniture, hatching, setting-out dimensions — so room names and walls stay readable once pins go on.
- Check the plan against something you know: put a dimension on a wall whose length you know. If it comes out right, distances you take off the plan later will be right too.
On the walk: one pin per snag
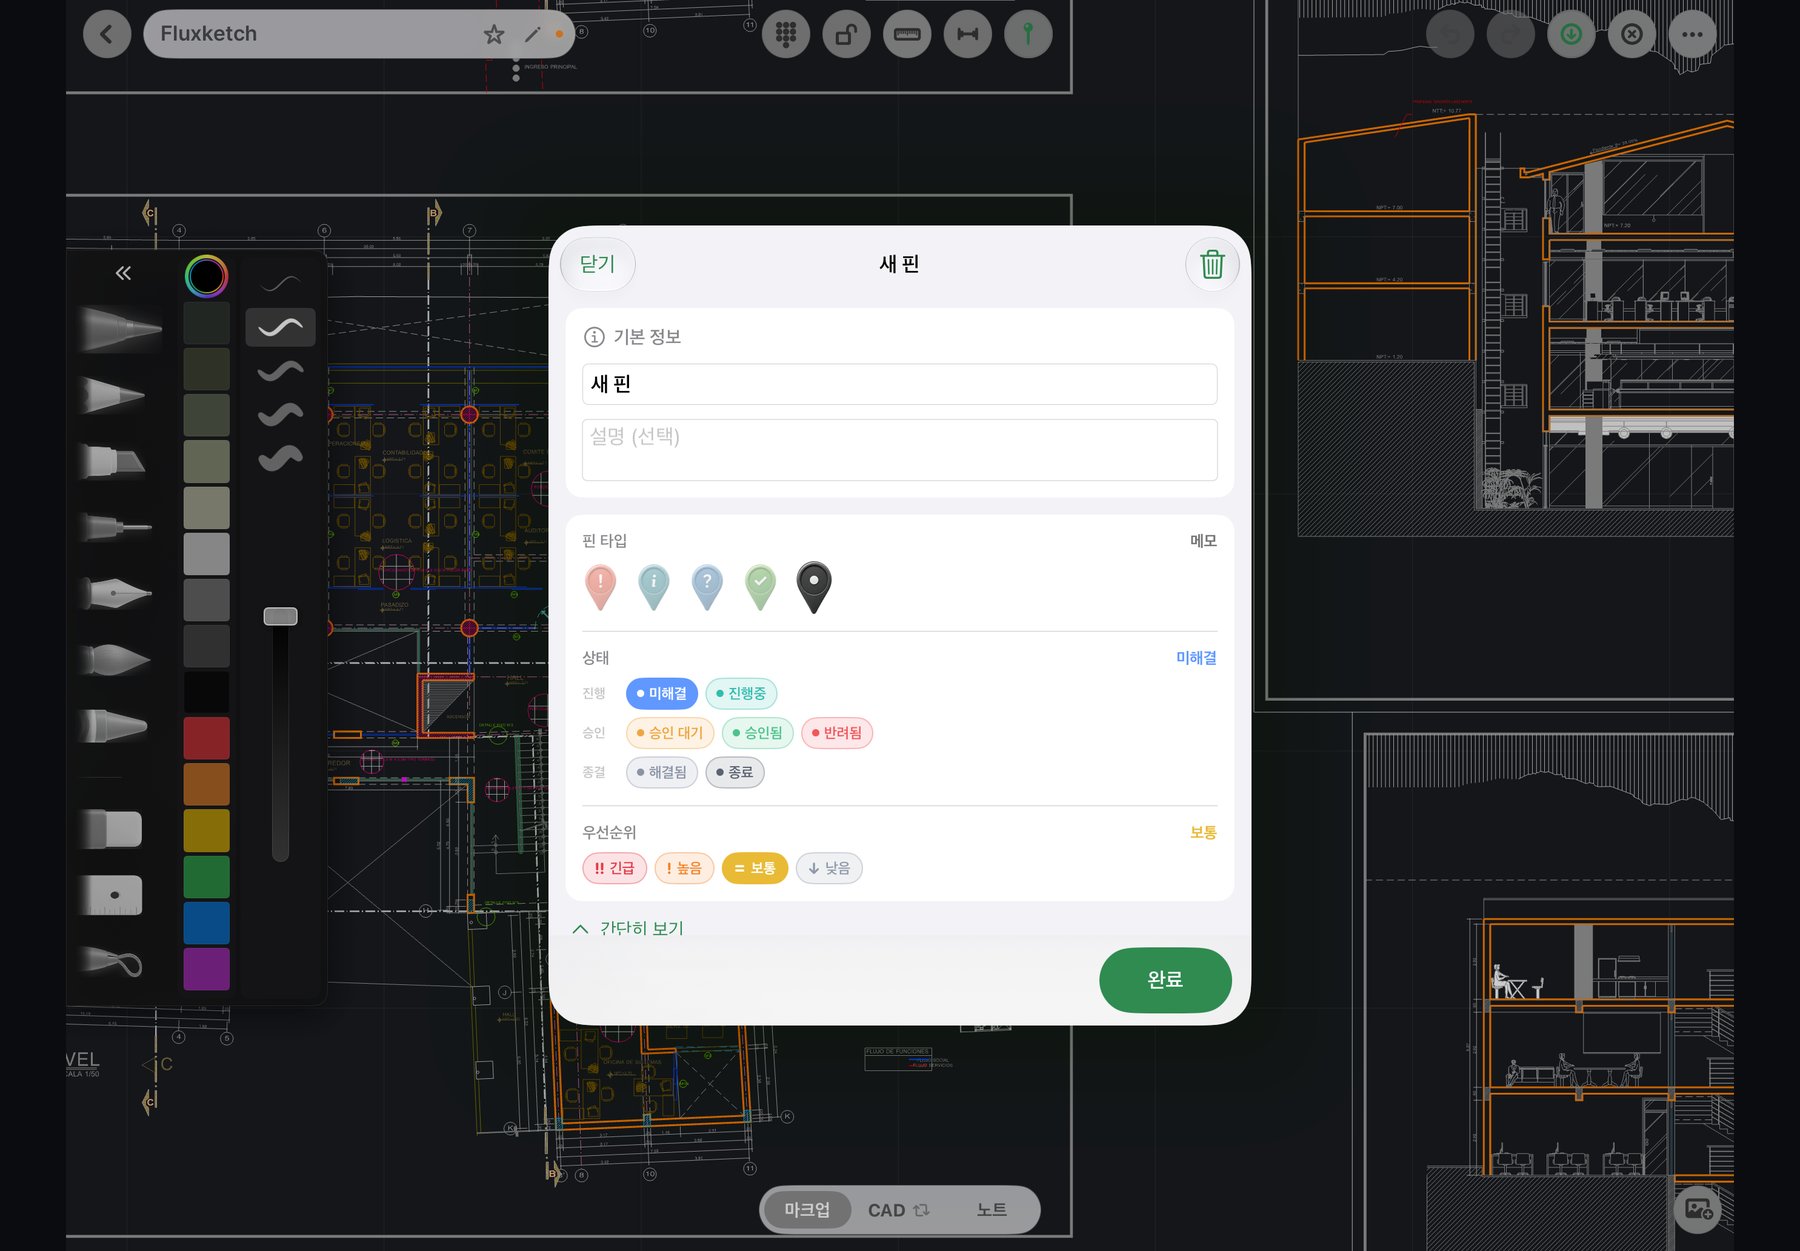
- Stand where the defect is and drop a pin on that spot on the plan. The pin is the location — no "left wall" wording needed.
- Give the pin a short title in a fixed pattern, for example room — element — defect: "2.05 — window reveal — paint run".
- Write the description as an instruction the trade can act on: what is wrong, how big, how high.
- Attach the photo to the pin. Take a close-up for the defect and a wider shot so the trade recognises the room.
- Where one pin isn't enough — a whole area of floor tiling, a run of skirting — draw on the plan with Apple Pencil: cloud the area, add an arrow, write a short note. The markup sits on top of the drawing without changing it.
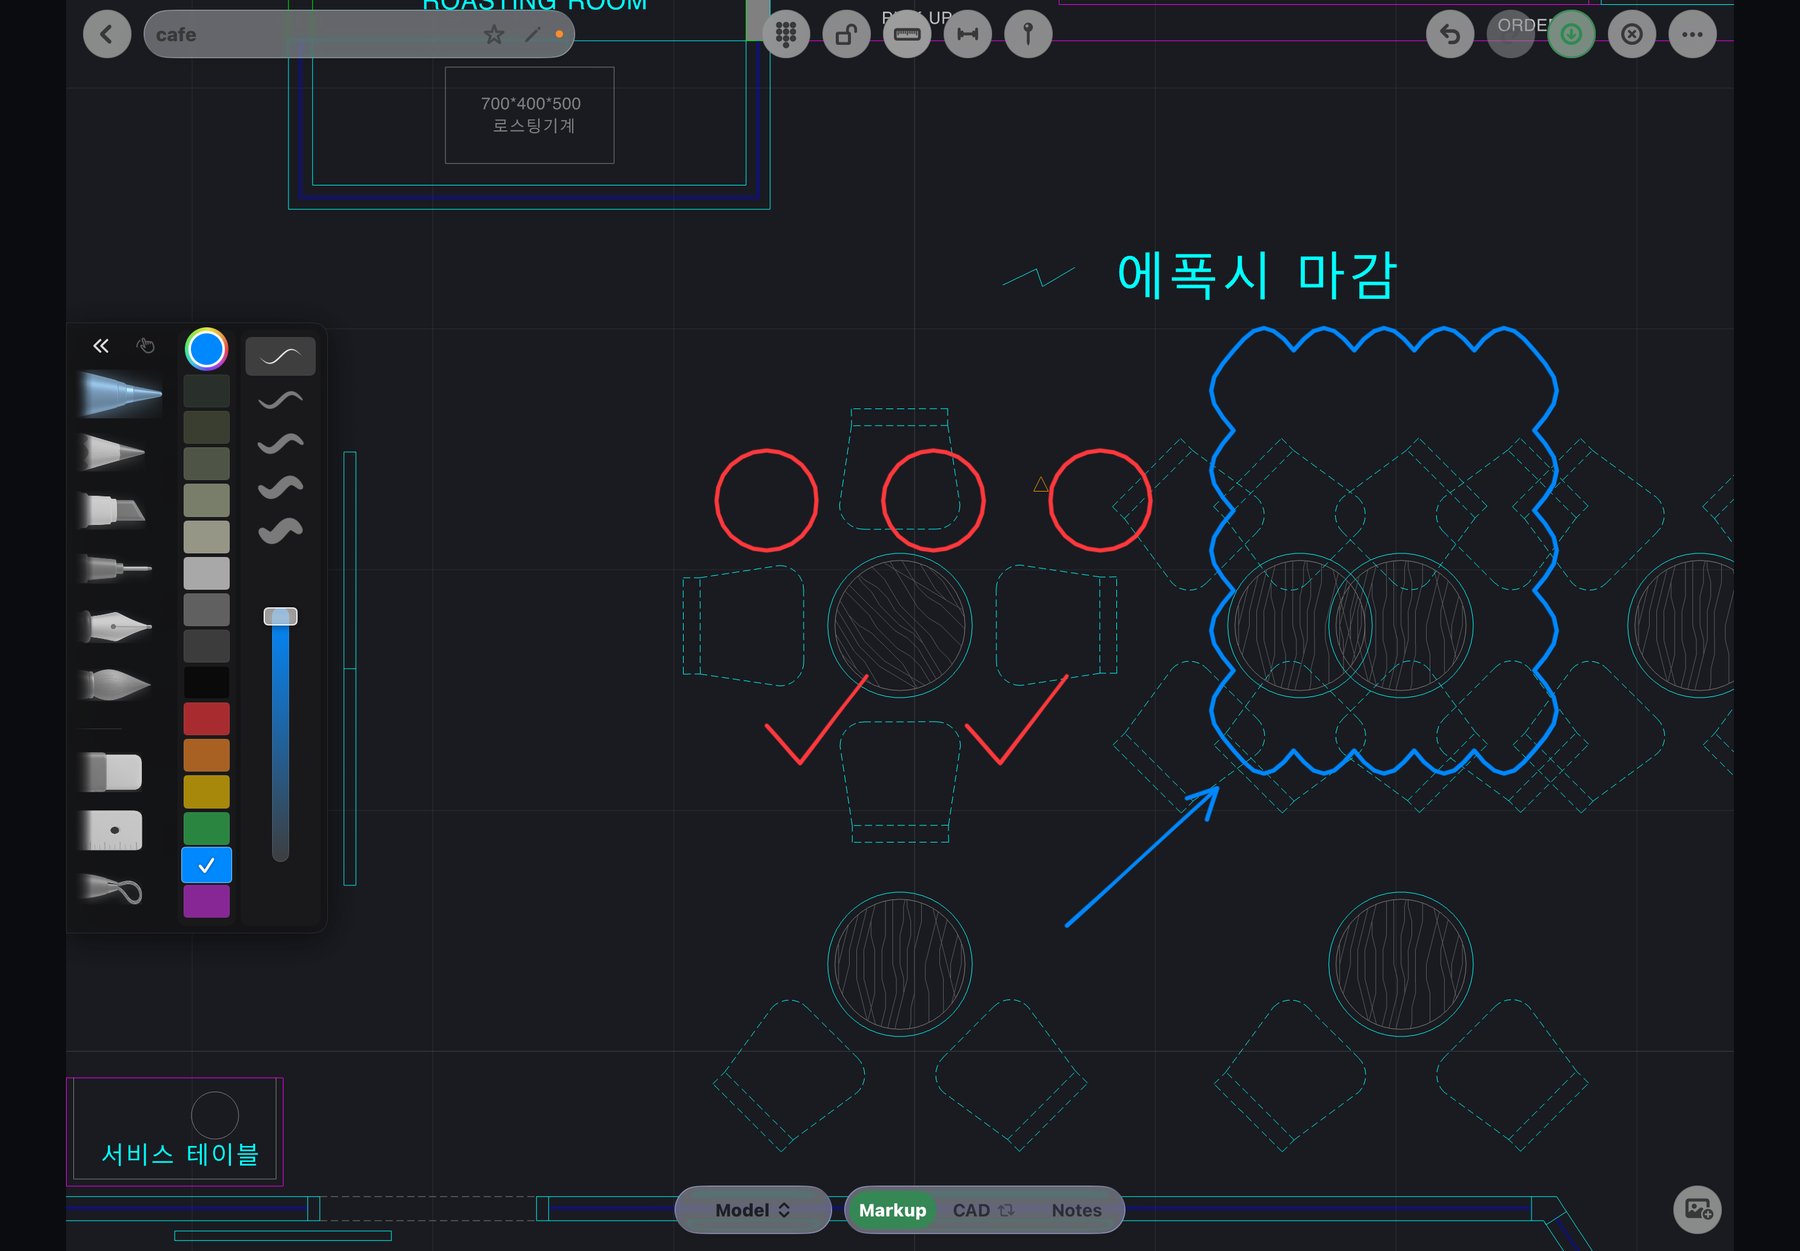
One defect, one pin. Three problems in the same room are three pins. When the decorator fixes two of them, each fix is noted on its own pin and the third is plainly still open, instead of one combined item that is half done.
After the walk: issue the list
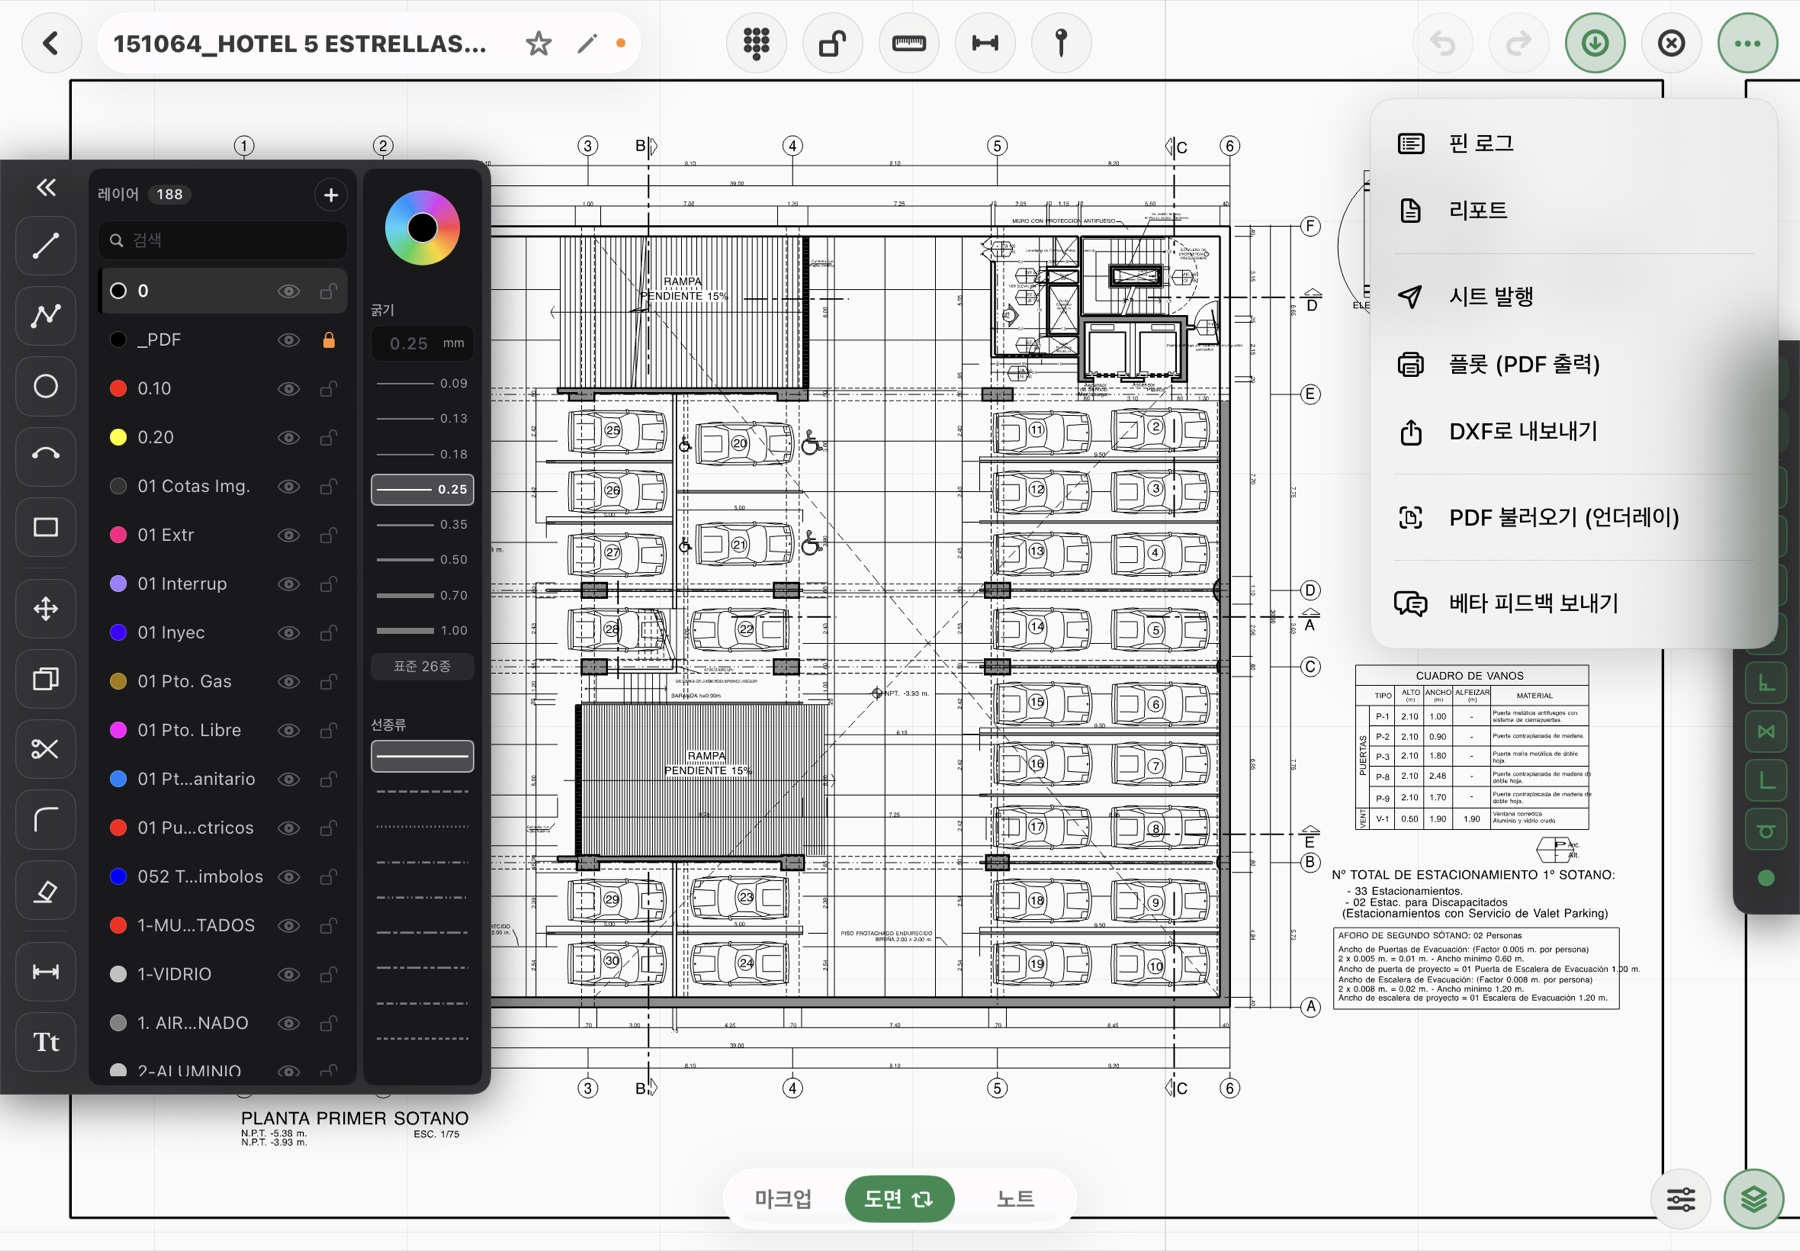
Export the pins as a report PDF — each pin's photo and note go into the report, so the contractor gets the location, the description and the evidence in one file. Send it the same day while the walk is fresh. If the contractor also wants the drawing itself, plot the plan to a PDF at true scale so it can be measured on paper; how to check the scale is in Plotting CAD drawings to scale PDF from iPad.
Re-inspection and closing out
- Walk the list again with the same plan. Open each pin, look at the original photo, and check the fix against it.
- Update the pin's note with the result — "fixed, checked" or what is still wrong — and photograph the finished work.
- Issue an updated report PDF after each round, so the contractor always has one current list rather than a pile of marked-up printouts.
Habits that make the list work
- Agree the wording with the contractor before the first walk: what counts as a snag and what is only an observation.
- Photograph before you write. The photo is the item's evidence; the note explains it.
- Keep titles short and consistent so a long list can be read in one pass.
- Pin on the drawing everyone is building from. If the plan changes, say so on the report.
- Markup is for areas and directions; pins are for items. Mixing the two makes the list hard to count.
Fluxketch keeps pins, photos and notes on the floor plan and exports them as a report PDF. Download it from the App Store and try it on your next walk.
Download on the App Store